


Have you ever seen those custom wood signs and wondered how to make you own? Well, I decided to try my hand at this craft and realized very shortly into the project that sign making is a serious business that takes a lot of patience (and supplies).
(This post is sponsored by Fusion Mineral Paint & RYOBI).
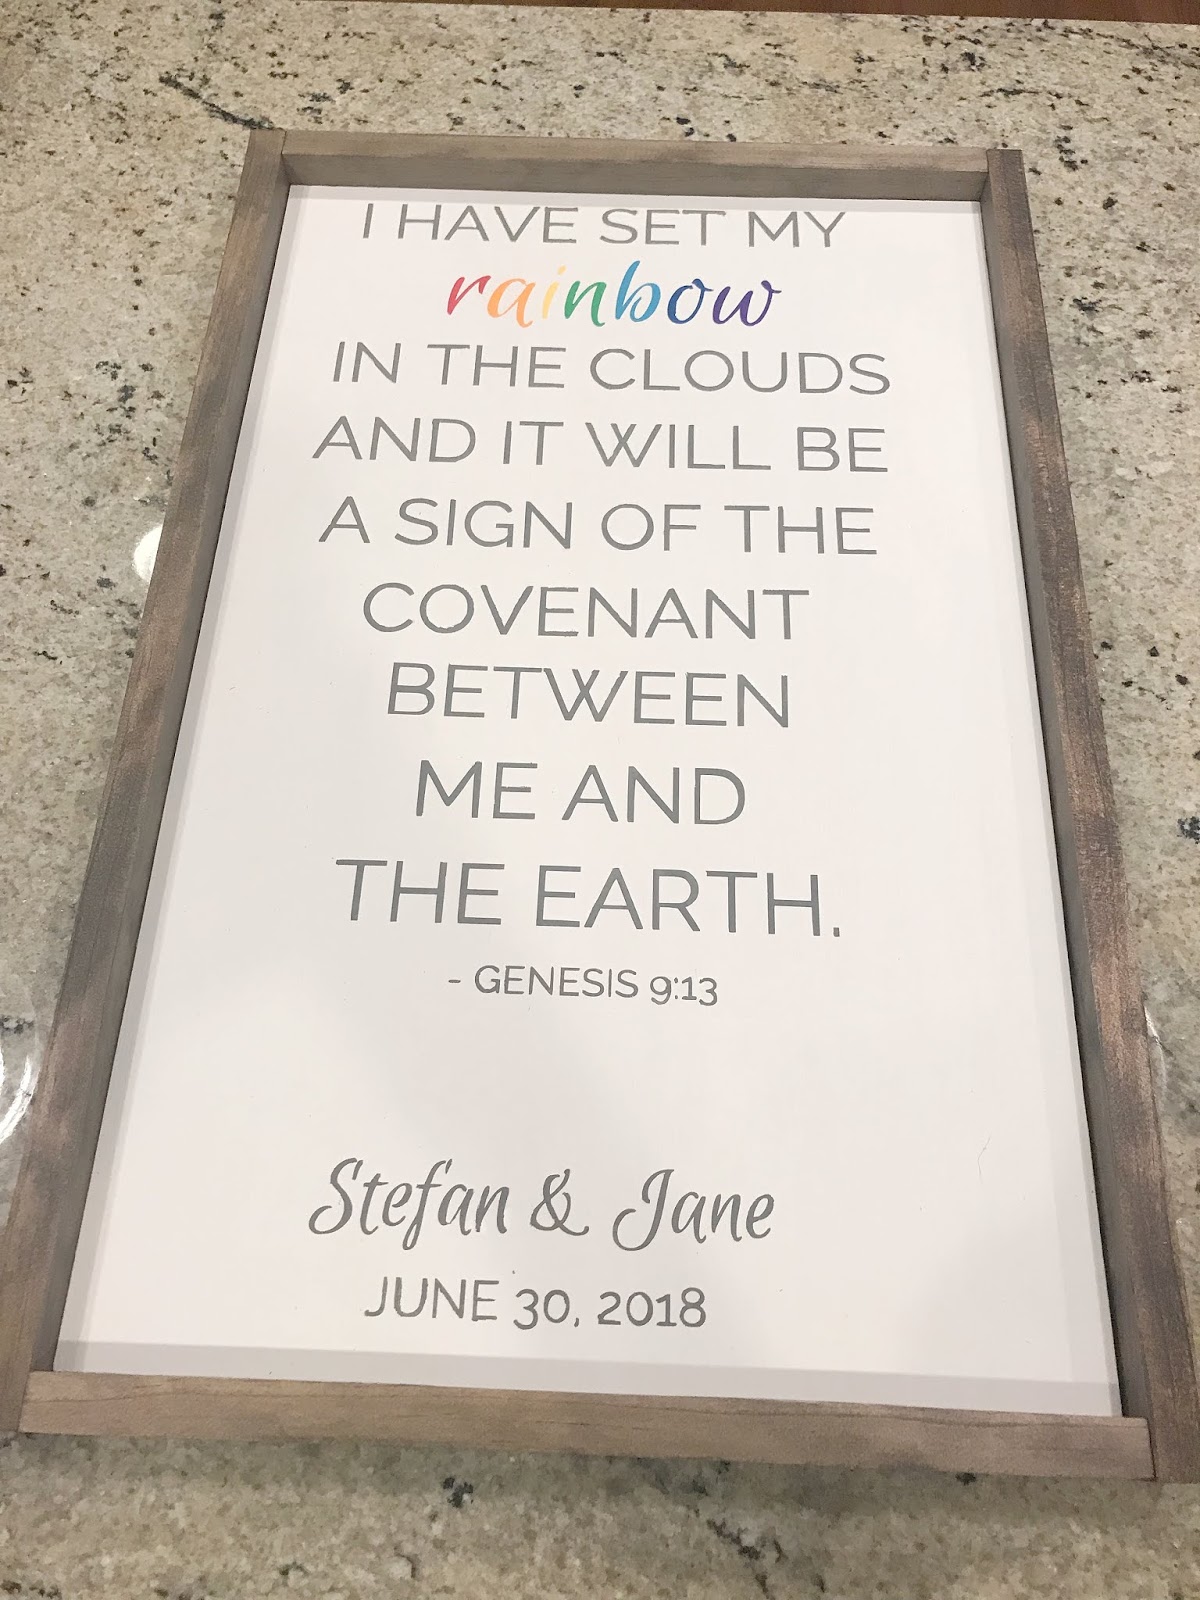
As I was racking my brain for what to get as a wedding gift for my uncle I decided I wanted to make something special. I had my sights set on a custom wood sign but I also realized this decision was being made about a week before the wedding so after reaching out to my favorite sign shop to realize I was cutting it too close I decided I would need to make my own.
I did a bit of research on what materials were needed but I also asked my Insta pals for some guidance. Here is what you'll need for this project (this post may contain affiliate links- see full disclosure here):
- Plywood (cut to size)
- 1 " by 2" pine boards (cut to size)
- Stain of choice (I mixed 50/50 Minwax in Dark Walnut and Grey)
- Vinyl Cutter
- Stencil Vinyl
- Paint for base (I chose Fusion Mineral Paint in the color 'casement')
- Acrylic Paint for lettering (I mixed black and grey and used multiple colors for rainbow)
- Regular paint brush
- Small sponge brush
- Small detail paint brush
- Wood Glue
- Nail Gun
Ok, let's get started!
I decided to pick up a small piece of plywood from Home Depot and have it cut to size. I chose to do 15" by 24".


Once I had my piece of wood picked out I gave it a couple coats of my go-to Fusion Mineral Paint.

Once that had time to dry (I let it sit overnight) I applied the stencil I had created with my Cricut.

After all of the stencil was applied I made sure to 'seal' it with a thin layer of modge podge. I was told this would help prevent bleeding.


Then, I painted over the stencil using acrylic paint.


I let this dry for about an hour and then began to peel the stencil. Once it was removed I noticed that despite the Modge Podge the paint had bled a bit.

I went ahead and took my small detail brush and cleaned up the edges with the Fusion Mineral Paint and all was fixed! It wasn't perfect but that is okay!

Once all of the paint was dry I began to lay out the frame.

Once I decided how I wanted it to lay, I stained the frame using a mixture of Minwax in Dark Walnut and Grey.
Then it was time to nail the frames to the sign.

I started by dabbing a bit of wood glue on the edges of the sign then pressing the frame to it and nailing at each corner.
And finally the sign was complete!

I absolutely love how it turned out and SPOILER my Uncle and new Aunt loved it! <3
It will probably be a while before I made another sign but I did have so much fun making this even with the bumps along the way!
Have you made a wood sign? Any tips you'd share? Let me know in the comments below!
Thank you for visiting R&R at home!


Post a Comment
Share your thoughts with me!