

I am so excited for the Halloween season to begin! Halloween really feels like the beginning of the holiday season which is my absolute favorite time of the year! I love everything about fall from the pumpkin spice flavors to clear blue skies and rainbow colors of changing leaves. Maybe a little bit of me loves fall because once Halloween is over it's pretty much Christmas time in my books (this is a moment I will say #sorrynotsorry). Of course we still celebrate Thanksgiving... we just do it with Christmas decor up! No shame in my holiday decorating game.
Anyway, Halloween has always been one of my favorite seasons to decorate for! I don't know if it is because my husband and I moved into our first house together during the Halloween season so I get a bit nostalgic when pulling out old decorations or just the whimsical aspect of all of the decor. It feels like you cannot go wrong! Nothing is off limits with Halloween decorations.
This year, I wanted to step up our front porch game for Halloween decorations. I was 'pinspired' by The Polka Dot Chair to create these hanging witch hats! I am so glad I found this idea because it is so magical and fun!
Let's get started!
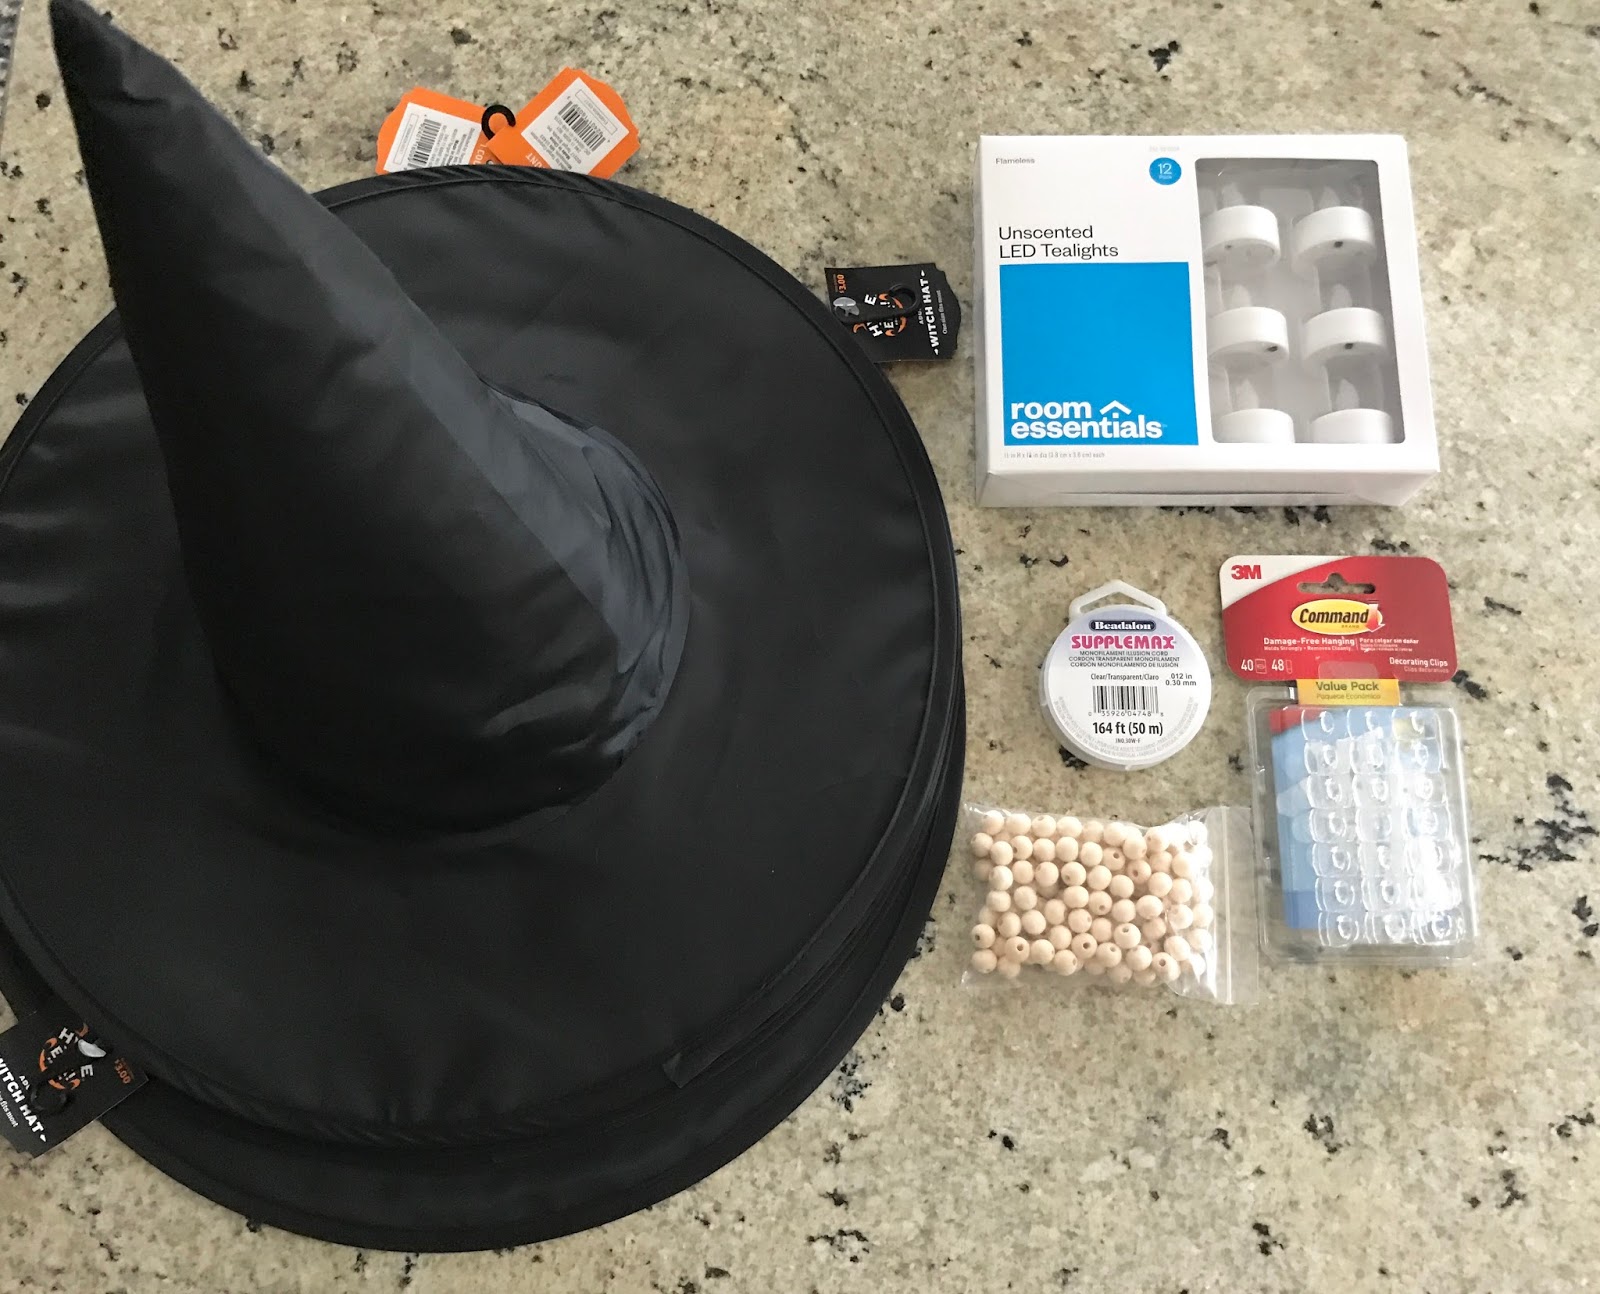
What you will need:
- Witch hats (I used 6)
- Clear string or fishing line
- Wood beads (any sort of bead would do- I just happened to have these from another project)
- Battery Operated Tea Lights
- Tacs or Outdoor command strips
The first thing you will want to do is measure your string. I started with about three feet per hat to give me some give and take when hanging the hats.
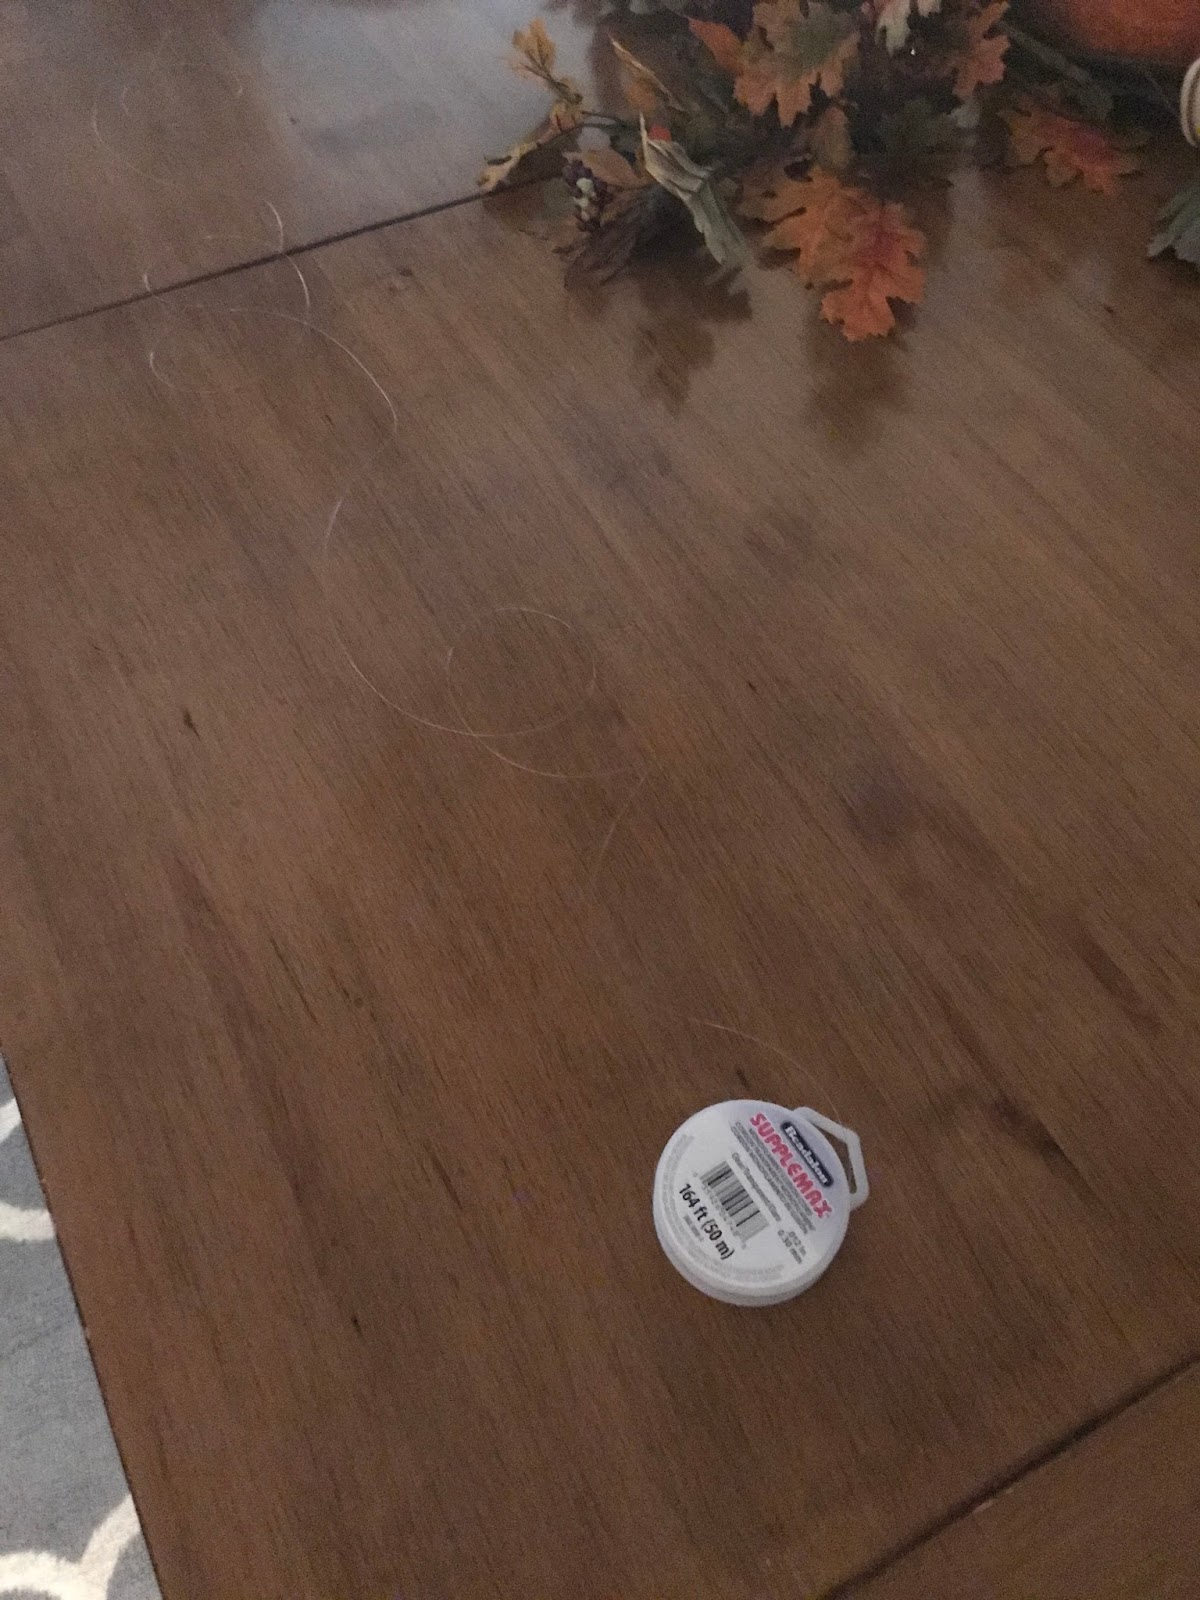
Then, I tied one end around the flame of the tea light.

I measured exactly how low I wanted the tea light to hang inside of the hat. Then, I placed a wood ball where I wanted to create a 'stopper'. There are a lot of things that could work for this step but I just happened to have these on hand and they were the perfect size to fit at the end of the hat.


This next part would have been easier had I had a sewing needle on hand but I could not find one so I simply turned the hats inside out and cut a very very VERY small hole to start feeding the line through.

Then I turned the hats right side out and pulled tight!

Super easy to reach up under each hat at night to turn the tea lights on/off!


Next was hanging the hats. I started by trying command strips but because our porch ceiling does not have a smooth finish (and because I forgot to get 'outdoor' strips) they did not last so I resorted to using tacs. I simply did a double not loop around each tac!

I just love how they turned out! Such a fun, whimsical way to add some Halloween decor to your porch!


How do you decorate your porch for fall? Share your projects in the comments below!
As always, thank you for visiting R&R at home!

“I’m joining the Hauntingly Beautiful Decor Halloween Link Party and you can too!”
(insert the link (URL) into the underlined text)


13 comments
Very fun tutuorial! I have been wanting to learn how to make these. You should come over and link up this post at the Hauntingly Beautiful Decor Link party. Hope to see you there!
ReplyDeletehttps://followtheyellowbrickhome.com/hauntingly-beautiful-decor-halloween-link-party-friday-features/
Hi Amber! Thank you for stopping by the blog to check out my tutorial! And thank you for letting me know about this link party! I just submitted these hats :)
DeleteThis comment has been removed by the author.
ReplyDeleteYour porch looks so cute! What a fun craft that the kids would love! ~ Kristin www.whitearrowshome.com
ReplyDeleteThank you for stopping by my blog Kristin! I am so excited to see all of the kids reactions on Halloween! :)
DeleteSo cool! I’m bringing back my More the Merrier link party (starting next Monday the 16th) would love for you to stop by my blog and link up your floating witch hats and any other projects you've been working on. http://diyhshp.blogspot.com
ReplyDeleteThat sounds like such a fun link party! I will definitely stop by with some fun DIY projects! :) Thank you for visiting my page!
Deletei love this!
ReplyDeleteb
Thank you so much!! And thank you for stopping by my blog!
DeleteYour floating witch hats are super cute! Thanks for the tutorial. Visiting from Inspiration Monday
ReplyDeleteHi Rebecca
ReplyDeleteWow! What a big impact these hats make! Such a fun and simple idea that packs a big wow factor - Well done! Thank you for this inspiration! I'm off to discover the rest of your blog.
Catherine (latest follower of your blogging adventures)
Awesome impact to your porch. The kids will love this as well as the adults. Thanks for sharing your tutorial.
ReplyDeleteI have seen it done with glow sticks, this is a much better idea because you can turn them on every night. Thank you
ReplyDeleteShare your thoughts with me!